Add images to products
You have now created your products and want to add an image to the product - below you'll see how this can be done.
To find information on how to create a product in Rackbeat, then please take a look at our article How to create a product
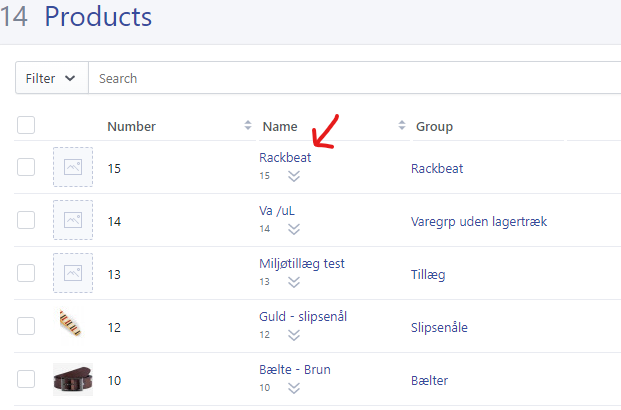
When you have created a product and want to add an image to it, then we will have to start by finding the product in the category "Inventory".

Start by finding the product that you want to add an image to, find the product in your inventory.
In this case we're looking for "Rackbeat".

When you've found the product that you want to add the image to, then click on the product name.
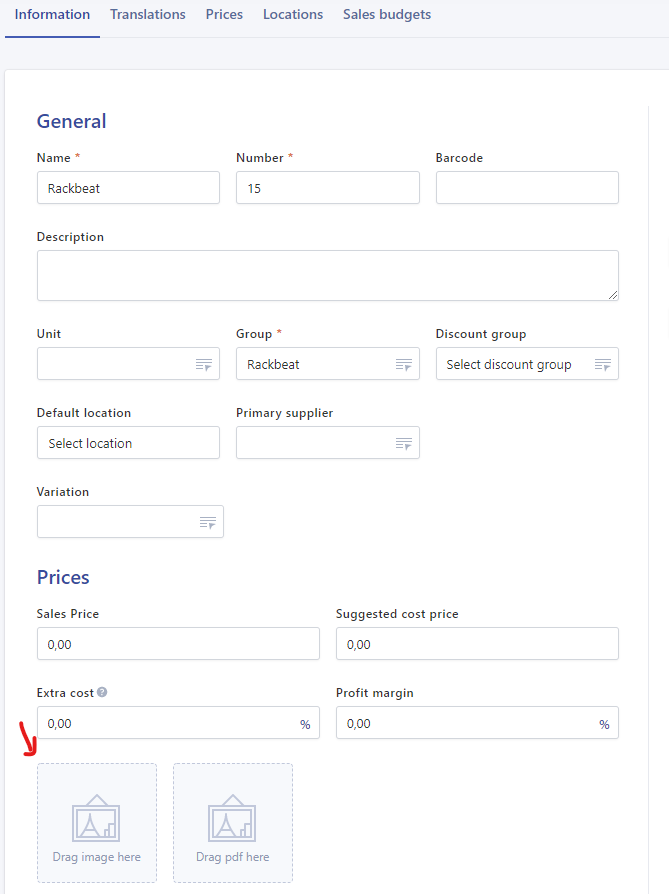
Clicking on the product name will lead you to the product settings, here you will find an array of settings that can be useful when setting up more product information.
A pop-up window will open up where you can access and change a whole lot of information about the product, but in this instance we just want to add an image to it.

In the screenshot above, you can see where you are able to add the image.
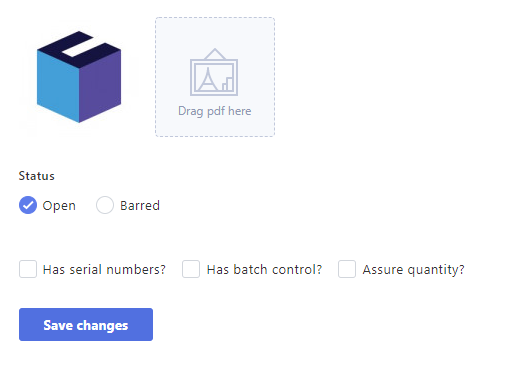
When you have added the image you want, then please click on "Save changes".

You have now added an image to a product in Rackbeat.