With the correct setup, you will be able to synchronize orders and manage shipments directly from Rackbeat to Webshipper.
Preparation before installation
Before you can install the Webshipper integration, you need to ensure the following settings are in place:
-
Webshipper login: You must have a Webshipper login. This user must not be deleted.
-
Webhooks subscription: Make sure you have a Pro subscription or higher in Webshipper, as access to webhooks is required to integrate Webshipper with Rackbeat.
-
Order Channel: You must have created at least one order channel in Webshipper.
-
Shipping Rates: The relevant shipping rates from Webshipper must be created as delivery terms in Rackbeat.
Installation
Follow the steps below to install the Webshipper integration in Rackbeat:
-
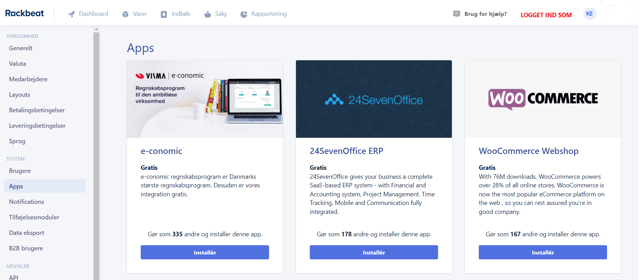
Go to User Settings → Integrations in Rackbeat.
-
Click Install on the Webshipper integration.
-
Enter your Webshipper account, as well as the email and password for it.
-
Click Save settings and start first sync.
Configuration of settings
When the integration is installed, you need to configure the following settings to ensure the systems can work together:
-
Webshipper Order Channel:
Select an order channel used to transfer orders from Rackbeat to Webshipper. If multiple order channels are created, orders will be fetched from all of them, if configured.
-
Standard Shipping Rate:
Once an order channel is selected, you must choose a default shipping rate. This can be selected per delivery term or set as a global standard.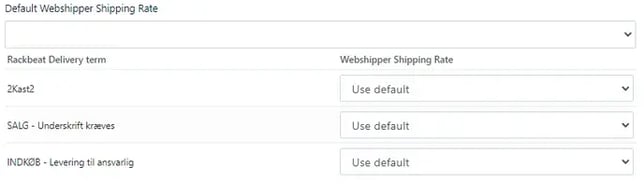
-
Send delivery and pickup address to Webshipper:
Enable this option to ensure that the delivery and sender addresses from Rackbeat orders are synchronized with Webshipper.
-
Manually synchronize Webshipper orders:
This function allows manual synchronization of orders from Webshipper to Rackbeat. Enter a specific Webshipper Order ID to transfer an order manually.
-
Rackbeat default payment terms:
Select the default payment terms that will apply to all orders created in Rackbeat via Webshipper.
-
Rackbeat default customer group for Webshipper orders:
Select a default customer group for orders created in Rackbeat via Webshipper.
-
Exclude customer groups for Rackbeat orders:
Choose which customer groups should not be transferred from Rackbeat to Webshipper. If none are selected, all orders will be transferred.
-
Rackbeat product group:
Select the product group where all products created via Webshipper will be placed. -
Rackbeat default employee:
Choose an employee who will be linked to all orders created in Rackbeat via Webshipper.
-
Rackbeat default layout:
Select a layout that will be applied to all orders created in Rackbeat via Webshipper.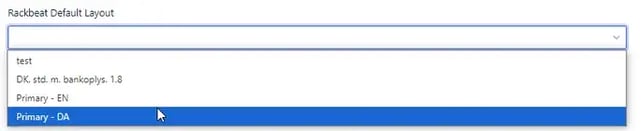
-
Rackbeat default VAT zone:
Choose a standard VAT zone to be applied to all orders from Webshipper.
-
Activate MOSS:
When enabled, customers created or updated in Rackbeat via Webshipper orders will automatically be assigned a VAT zone based on the delivery address:-
Domestic: If the delivery address matches the Webshipper shop’s country.
-
EU countries: The VAT zone will match the specific EU country.
-
Outside the EU: The VAT zone will be set to the default VAT zone selected under Rackbeat Default VAT zone.
Important: Make sure the VAT rates for EU countries in product groups are identical in both Rackbeat and e-conomic before enabling this feature.

-
-
Use products default location on order lines?
The checkbox Use products default location on order lines determines which location is applied on order lines.-
If checked, the product lines will use the product’s default location (in Rackbeat).
-
If not checked, the product lines will always use the location selected under Rackbeat default product location.
-
-
Rackbeat Default Product Location:
Specify the location that products should be drawn from by default when taken from stock in Rackbeat.
Order Flow
To control how orders are transferred between Rackbeat and Webshipper, you can configure the following:
-
When an order is marked as shipped in one system, it will also be marked as shipped in the other system.
-
Transfer orders both ways: Orders transfer both ways. Rackbeat receives orders created in Webshipper, and Webshipper receives orders created in Rackbeat.
-
Rackbeat to Webshipper: Rackbeat synchronizes orders to Webshipper. Orders created in Webshipper will NOT transfer to Rackbeat.
-
Webshipper to Rackbeat: Webshipper synchronizes orders to Rackbeat. Orders created in Rackbeat will NOT transfer to Webshipper.
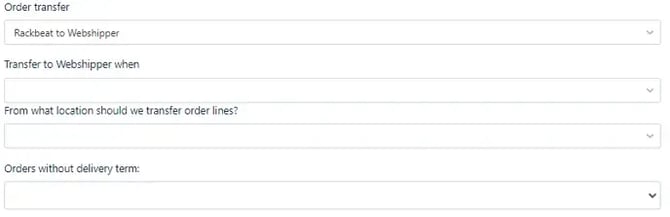
Order transfer:
Under Order transfer, choose how the order flow should work between Rackbeat and Webshipper:
-
When an order is marked as shipped in one system, it will also be marked as shipped in the other.
-
Transfer to Webshipper when:
Choose when an order should transfer from Rackbeat to Webshipper:-
Order is created: An order created in Rackbeat will transfer to Webshipper once it has status booked.
-
Shipment is picked and shipped: Data transfers to Webshipper only once a shipment is picked and shipped in Rackbeat. This can be useful when working with partial shipments.
-
-
From what location should we transfer order lines:
Choose one location (pre-created in Rackbeat) that will be transferred to Webshipper. If everything should transfer, select all locations.
This means only product lines with this specific location on a given order will transfer to Webshipper.
-
Orders without delivery term:
Decide how orders without delivery terms should transfer. You can choose between:-
Transfer without shipping rate: Transfers the order to Webshipper without a shipping rate.
-
Use default: Uses the default delivery term selected under company settings in Rackbeat.
-
Don’t transfer: Does not transfer orders without a delivery term.
-
Finalizing setup
Once the integration is configured, click Save settings and start first sync.