How to make adjustments (inventory amount/cost price)
If you need to change the cost price or quantity of a product, you can make an adjustment.
Below, we’ll guide you through how to create a manual quantity or cost price adjustment.
If you want to learn how to import several inventory adjustments at once, read this article: Importing in Rackbeat.
Table of contents
Quantity Adjustment
To adjust quantity, follow these steps:
-
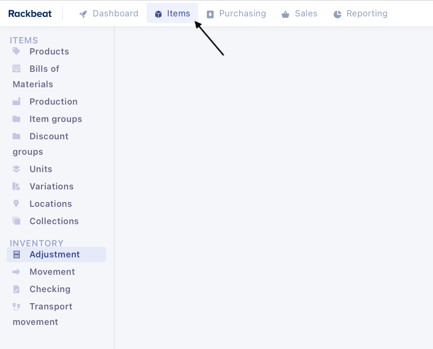
Go to Items: Click "Items" in the top menu.
-
Create an adjustment: Select "Adjustments" from the menu and click "Create new adjustment" in the upper-right corner.

-
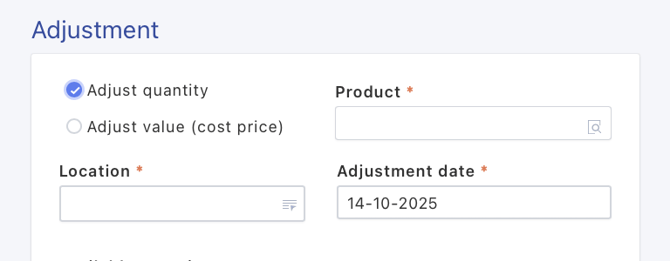
Select adjustment category: Choose "Adjust quantity" and select the item, location, and date for the adjustment.
- Enter adjustment details:
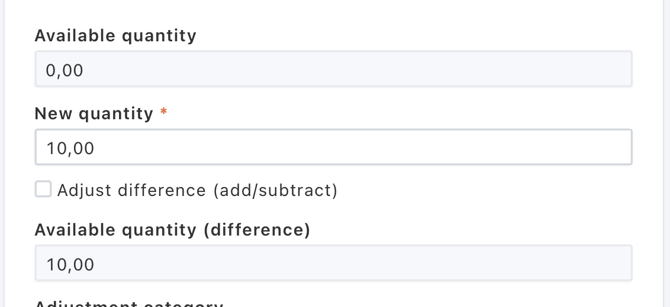
a. View the current stock level in the field Available quantity.
b. Decide whether you want to add/subtract a quantity or set a new total.
-
-
To add or subtract, check the box Adjust difference and enter the quantity to add or subtract.
-
To set a new total, uncheck Adjust difference. The item’s current stock level will be changed to the number entered in the field.
-
Complete the adjustment:
Add an Adjustment Category, Reason, and Description. Click Adjust quantity + value to complete the adjustment. Remember, the adjustment is saved as a draft and must be booked before it updates your inventory.
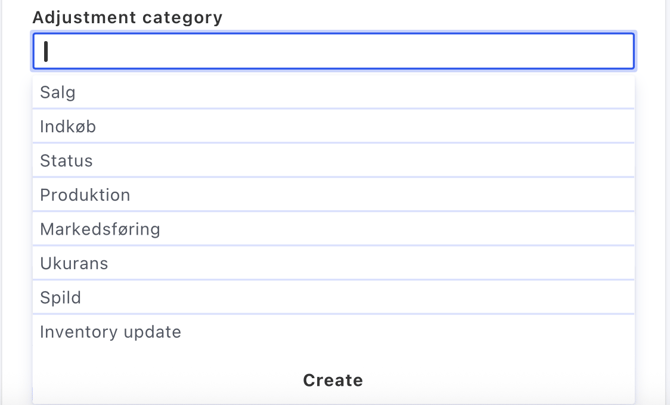
The Adjustment Category is for internal use and appears in your Transaction Report.
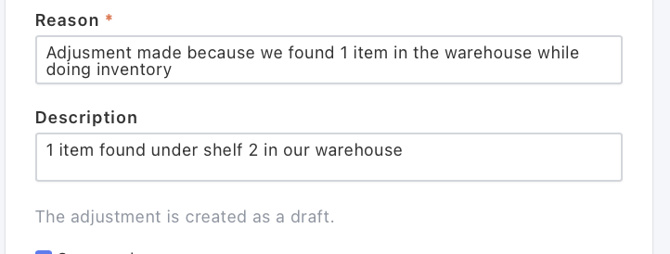
The Reason is visible in the Transaction Report.
The Description is visible on the Item Ledger Card.

The adjustment is saved as a draft. You must post it (see step 6) for it to take effect.
The button Save & New allows you to create another adjustment if you have more to make.
Cost Price Adjustment
Below is a step-by-step guide on how to create a cost price adjustment.
Note: The item must have stock available before you can adjust its cost price.
Tip: If you need to change the cost price of an item without any stock, you can increase the stock quantity first, then make the cost price adjustment, and finally reduce the quantity again.
-
Go to Items: Select "Items" from the top menu.
-
Create an adjustment: Go to "Adjustments", click "Create new adjustment", and choose "Adjust cost price".
-
Select item and date: Choose the item, cost price, and date for the adjustment.
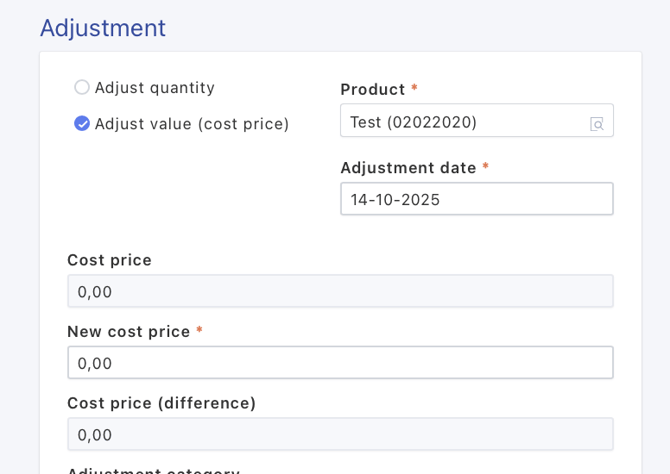
- Enter adjustment details:
a. See the current cost price and type in the new price in "new cost price"
b. "Cost price (difference)" shows the difference between the new and former cost price. - Complete the adjustment: Add an Adjustment Category, Reason, and Description, then click "Adjust cost price" to complete. Remember to post the adjustment in the adjustment overview to update the cost price.
Adjustment Category
Used for internal purposes and shown in your Transaction Report.
Reason and Description
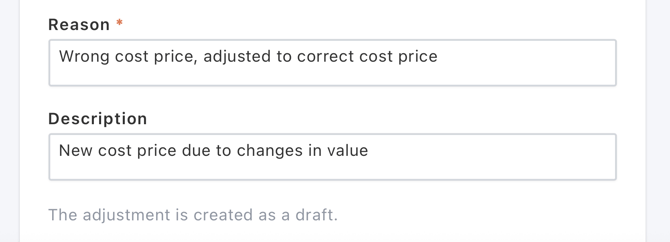
Reason is visible in the Transaction Report.
Description is visible on the Item Ledger Card.

The adjustment is saved as a draft and must be booked. The button "Save & New" allows you to create another adjustment if needed.
6. Book your adjustment: To apply the adjustment to your inventory, it must be booked in the adjustment overview 
7. See changes: You can see your adjustments on the product ledger. You can find the ledger by going to your product overview and hovering over the three dots on the right side of the line of the product, and selecting "ledger".
Frequently Asked Questions
Can I make adjustments retroactively?
Yes — you can make adjustments for past dates.
Simply change the date to the desired time period before saving the adjustment.
You can make retroactive adjustments both manually and via import.
Do I need to book every adjustment I make?
Yes. Adjustments only take effect once they have been booked.
To post all adjustments at once, click "Book all".
If you choose to book or delete all adjustments, a confirmation pop-up will appear before proceeding.
Who made the adjustment?
You can see who created an adjustment by going to Items → Adjustments and filtering for archived adjustments.
In the User column, you’ll see which user created it.
It’s not possible to see who booked the individual adjustment.
Why do I need to select a location?
If your account operates with multiple locations, you must select one to ensure the adjustment is registered in the correct place.
If an item has a default location, this will be automatically selected.
FIFO and adjustments?
If you’re using FIFO (First-In, First-Out) as your inventory method in Rackbeat, there are a few important differences to be aware of when making adjustments.
One key difference is that when adjusting quantity, you must also enter a unit cost price.
In the tooltip(grey question mark above field), it says:
“For FIFO inventory, a cost price must be defined when making an adjustment. If the difference is negative, the unit price will be calculated based on the FIFO principle.”
FIFO stands for First-In, First-Out. This means that when you add one or more items to your inventory, Rackbeat will still display the oldest stock first.
Therefore, the cost price shown in the Item Overview reflects the cost price of the next item to be sold.
Example:
You purchase 10 units at 15 DKK each, and then another 10 units at 20 DKK each.
Rackbeat will show a cost price of 15 DKK until the first 10 are sold — after that, it will show 20 DKK.
Learn more about inventory methods here: Inventory Principles.
Cost Price Changes and FIFO
By default, it’s not possible to change the cost price of your items in Rackbeat when using the FIFO inventory method.
To do this, you must first reset the item’s inventory balance, and then create adjustments for each price level — either manually as relative adjustments (with quantity and cost price) or via import, where each price level is on its own line. These must also be entered as relative adjustments.
To avoid misunderstandings or errors, we recommend contacting Rackbeat Support if you’re unsure how to proceed.
The button "Save & New" allows you to create another adjustment if needed.
Book your adjustment
Book your adjustment: You must book the adjustment for it to take effect on your inventory — the change can be seen on the Item Ledger Card.
If you have multiple draft adjustments, you can post them all by clicking "book all".
View changes
You can view changes in the Item Overview or on the Item Ledger Card.
Tip: A quick adjustment can be made directly from the Product Overview by selecting "Adjust Inventory" from the three-dot menu on the product line.