This guide provides you with a step-by-step instruction on how to create, customize, and connect your layouts in Rackbeat. This is essential for customizing the PDFs and emails that are sent from the system.
To find layouts, go to Company settings - Layouts:
Layouts
Overview of layouts
A layout in Rackbeat consists of the overall layout with underlying templates that must be customized individually.
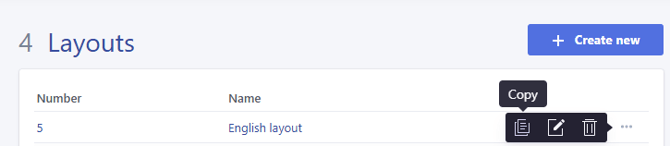
From the layout page, you have 4 options:
-
Create new
-
Click on the layout number (opens the underlying templates)
-
Click on the layout name (opens the underlying templates)
-
Hover over the three dots:
-
Copy the layout
-
Delete layout
-
Overview over layouts:
Underlying templates:
Edit function:
Step 1: Create a New Layout
- Navigate to Company Settings > Layouts.
- Select Create new.

- Name your layout, choose a language, and link a bank account.
- If you need to create your bank information in Rackbeat, we recommend you go through our "Setting up your Rackbeat from A-Z".

- Adjust the font size, add a logo, and possibly a signature or a watermark to all PDF files created with this layout.
- The watermark can also be used as a background on the PDF.

- Once you have entered and attached the basic information to your layout, you can click on Create and Edit.
Step 2: Edit your layout
Customization of Column View
- Navigate to Company Settings > Layouts
- Click on the Layout name and then select which part of the layout you want to edit.
- An example could be "Customer Invoice"

- An example could be "Customer Invoice"
- Select which columns should be displayed on your invoice or order line overview.

- Check the columns you want to see and adjust their width so that the total width constitutes 100%.
- You can find the total width at the bottom of the page.

- You can find the total width at the bottom of the page.
- Adjust the width so that the maximum is 100%.

- Save your changes.

Customization of Email Template
- Navigate to Company Settings > Layouts
- An example could be "Customer Invoice"
- An example could be "Customer Invoice"
- Click on Email template to edit the content of the emails sent along with the PDFs.

- Adjust the email's text and click on "Apply Changes" to the email template.


- Go to the bottom of the layout page and save your changes to the layout.

- You will now see the new text on the email template when you are about to send the customer invoice to your customer.

The following custom fields can be used in your e-mail body text.
Offers:
company_name (customer name)
name (customer name)
number (Tilbudsnummer)
Orders:
company_name (customer name), name (customer name), number (order number)
On order shipments:
name (customer name), number (order shipment id)
Invoices/credit notes:
company_name (customer name), name (customer name), number (invoice number), type (invoice or credit note)
Purchase orders
company_name (supplier name), name (customer name), number (purchase order number)
Customization of PDF
Customization of Payment Terms.
- Navigate to Company Settings > Layouts
- An example could be "Customer Invoice"
- An example could be "Customer Invoice"
- Click on PDF template to edit the text presenting your payment terms on the pdf.

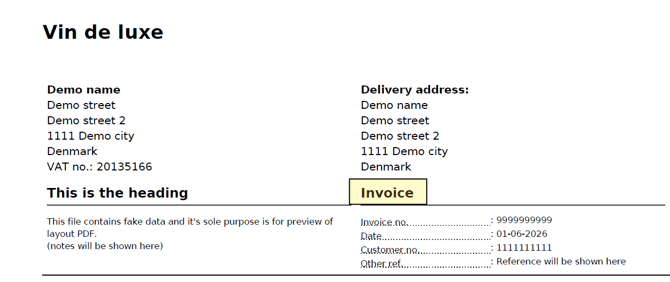
- Customize the payment terms within the PDF template, here you can use some of the dynamic fields that directly correspond with the information you have entered in your general settings. An example could look like this:

It will look like this on the PDF sent to the customer:
- Click on "Apply Changes" if you are finished editing the text for your payment terms and your footer.

- Remember to save the changes for the layout when you have clicked "Apply Changes".

You can find a list of the dynamic fields for the payment terms by looking under the box you enter them in, alternatively, we have a list of them for you here:
| Dynamic Field | Meaning |
| {number} | Invoice/Order number |
| {terms_name} | The name of the payment term appears here |
| {terms_description} | If a description is provided for the payment term, it will be displayed here. |
| {terms_due_date} | The due date |
| {bank_name} | The bank name associated with the bank information on the layout. |
| {bank_reg} | The registration number associated with the bank information on the layout. |
| {bank_acc} | The account number associated with the bank information on the layout. |
| {bank_swift} | The SWIFT number associated with the bank information on the layout. |
| {bank_iban} | The IBAN number associated with the bank information on the layout. |
| {fik} | The FI number associated with the bank information on the layout. |
| {total_weight} | The total weight of the goods on the order |
| {total_volume} | The total volume of the goods on the order |
| {total_quantity} | The total quantity of goods on the order |
| {other_reference} | The text from the field "Other reference" |
Customization of Footer
- Customize the footer in the PDF template.
- Adjust the text, here you can use some of the dynamic fields that directly correspond with the information you have entered in your general settings.

- Save your changes.
- Remember to click on 'Save changes' in the buttom of the page.

TIP! You can format the text by doing the following:
*ITALIC TEXT*
**BOLD TEXT**
***BOLD AND ITALIC TEXT***

Then it will look like this:
You can find a list of the dynamic fields for the footer by looking under the box you enter them in, alternatively, we have a list of them for you here:
| Dynamic Fields | Meaning |
| {number} | Invoice/Ordernumber |
| {name} | Here it displays the company name |
| {street} | Here it pulls the information entered in the "Street" field under business settings. |
| {street2} | Here it pulls the information entered in the "Street2" field under business settings. |
| {zipcode} | Here it pulls the information entered in the "Zipcode" field under business settings. |
| {city} | Here it pulls the information entered in the "City" field under business settings. |
| {country} | Here it pulls the information entered in the "Country" field under business settings. |
| {vat_no} | Here it pulls the information entered in the "VAT number" field under business settings. |
| {phone} | Here it pulls the information entered in the "Phone" field under business settings. |
| {email} | Here it pulls the information entered in the "Email" field under business settings. |
| {web} | Here it pulls the information entered in the "Website" field under business settings. |
| {bank_name} | The bank name associated with the bank information on the layout. |
| {bank_reg} | The registration number associated with the bank information on the layout. |
| {bank_acc} | The account number associated with the bank information on the layout. |
| {bank_swift} | The SWIFT number associated with the bank information on the layout. |
| {bank_iban} | The IBAN number associated with the bank information on the layout. |
| {other_reference} | The text from the field "Other reference" |
Adding Custom Fields
Custom fields can be added to offers, sales orders, delivery notes and customer invoices.
Attachment of PDF
If you want to attach a PDF, for example to all customer invoices, this is also possible in Rackbeat. Here you just need to add it to your layout.
- Navigate to Company Settings > Layouts
- Click on the Layout name and then select which part of the layout you want to edit.
- An example could be "Customer Invoice"
- An example could be "Customer Invoice"
- Attach the PDF document that you want to be included in all customer invoices sent to your customer.

- Save your layout.
Step 3: Connect Layouts to Customers or Suppliers
Connect the customized layout with relevant customers or suppliers, you do this by going to either the customer or the supplier and then adding it.

You can also choose a standard layout that is used for all new customers created in Rackbeat.
You do this by going to your general settings and setting a standard for both suppliers and customers.

Need help? Contact Rackbeat Support for assistance. We are here to help you get the most out of Rackbeat's Layout Designer.
Please note: All changes made to layouts will not be reflected on invoices, orders, etc. that already exist in the system.
FAQ
Here you will find a list of frequently asked questions regarding the use of layouts in Rackbeat.
Is there a smart way to work with other languages on my layout?
It is not possible to select other languages than those offered by Rackbeat, but there are some things you can do yourself, such as overriding the column names and editing the footer text. This will not change all the text on your PDF, but it will change some of it.
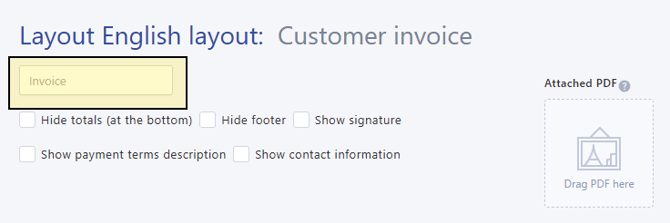
Can you change the title of the PDF?
You can change the title of the PDF, for example where it says “Invoice” or “Order”. To do this, go to the section where you can add or remove columns on the PDF and make the change there. Follow this guide:
- Click Company Settings.
- Select “Layouts”.
- Click the name of the layout you want to edit.
- Click the action you want to edit (e.g. Invoice).
- Edit the title field and save your changes.
Is it possible to make a copy of my layout?
Yes, it is possible to create a copy of an existing layout. You do this by going to your layout overview, hovering over the three dots, and clicking “Copy”.