This article walks you through the setup process of the integration between Shopify and Rackbeat, as well as the different points and options available during the setup.
Installing the Integration
The integration between Rackbeat and Shopify is available in Rackbeat's App Section.
Step-by-step Installation:
-
Company Settings: Hover over your username in the top right corner and click on “Company Settings” from the dropdown menu.
-
Apps: Click on “Apps” in the menu on the left-hand side.
-
Find Integration: Locate the Shopify integration and click “Install” to begin installation.
-
Add New: Click on “Add New” to add a new shop.
-
Select Shop: You will be taken to a page where you must select your Shopify store and connect it to your Rackbeat account.
The integration is now installed – but not yet configured. The following explains what each setting does, so you can configure the integration to suit your needs.
There are three main categories to configure:
-
General Settings
-
Products
-
Orders
Additionally, there is a page for:
-
Advanced Settings
General Settings
In this section, you can manage overall behaviors of the integration.
Initial Synchronization:
This option allows you to synchronise your products from Shopify to Rackbeat. This option is only valid the first time you activate the integration.

Customer Defaults:
When new customers are created in Rackbeat from Shopify, the options below will be used to fill out the information in Rackbeat.
Choose the default currency of your Shopify store

Here you have to select the default currency of the Shopify store that you are setting the connection up with.
Choose the default language for new customers

Here you have to select the default language that should be used in Rackbeat when the integration creates a new customer.
Choose the default VAT-zone for new customers

Here you have to select the default VAT-zone that should be used in Rackbeat when the integration creates a new customer.
Activate MOSS
![]()
When this setting is turned on, Rackbeat will automatically set the VAT zone for customers created or updated through Shopify orders, based on the shipping address:
-
If the shipping address is in the same country as your Shopify store, the VAT zone will be set to "Domestic".
-
If the shipping address is in an EU country, the VAT zone will match that country.
-
If the shipping address is outside the EU, or if no shipping address is provided, the VAT zone will use the option you've selected under "Default VAT zone for new customers."
Note! Country-specific VAT is determined based on the customer's country. Remember to set up country-specific VAT on your product groups before activating MOSS. See the guide here.
It is therefore not possible to use country-specific VAT for both B2C and B2B simultaneously — this will require an external integration with Shopify.
Choose the default Customer Group
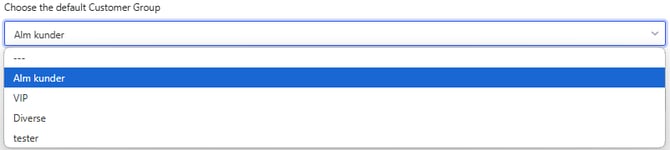
Here you have to select the default customer group that should be used in Rackbeat when the integration creates a new customer.
Choose the default layout for new customers

Here you have to select the default layout that should be used on the created customer in Rackbeat, when the integration creates a new customer.
Choose the default payment terms for new customers
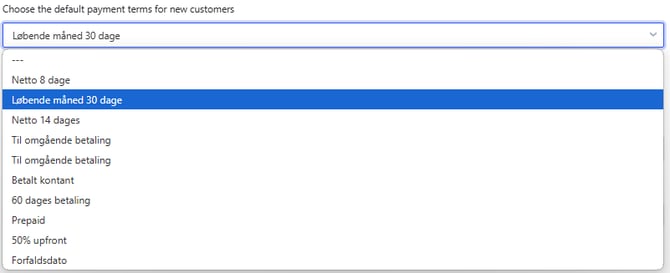
Here you have to select the default payment terms that should be used in Rackbeat when the integration creates a new customer.
Default Employees
New orders from either Online sales or POS are created with these employees as the default in 'Our reference'
Standard employee for Web orders
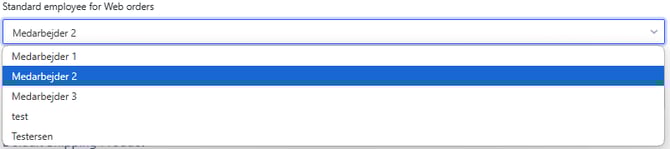
Here you have to select which one of your employees (created under the tab "Employees" in Rackbeat) that should be used as a standard for all incoming web orders when they get sent to Rackbeat.
Standard employee for POS orders
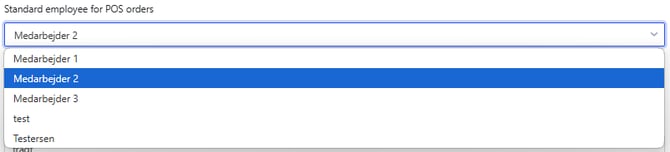
Here you have to select which one of your employees (created under the tab "Employees" in Rackbeat) that should be used as a standard for all incoming POS orders when they get sent to Rackbeat.
Default Shipping Product
A default Shipping product is required for the shipping costs to be transferred to Rackbeat correctly.
Shipping product number

Here you have to enter the product number for the product that you would like to use for shipping in Rackbeat.
Note! The product has to be created in Rackbeat and be in a product group without stock.
Products
This section determines how products are synchronized between Shopify and Rackbeat.
Product Synchronization

These settings determine which system should be in charge of creating and maintaining products
- If you select Rackbeat, your product will be synchronized live from Rackbeat to Shopify.
- If you select Shopify, your product will be synchronized live from Shopify to Rackbeat.
Transfer product description to Shopify
![]()
This field only shows up if you select "Rackbeat" in the Product Synchronization field
Checking this box will allow the integration to use the product description on your products from Rackbeat.
Be aware! Synchronizing the product description from Rackbeat to Shopify will overwrite the existing description and formatting on the products in Shopify. Only activate this field if you know what you're doing.
Choose the default product group

Here you have to select which product group that products should be placed in when synchronizing products from Shopify to Rackbeat.
Cost price synchronization from Rackbeat to Shopify

Here you have to select what cost price you want to transfer to your products in Shopify, you can select between:
- No transfer of cost price: The cost price will not be sent to Shopify.
- Transfer actual cost price: The actual cost price of the products will be sent to Shopify.
- Transfer recommended cost price: The recommended cost price of the products will be sent to Shopify.
Online availability

Here you can select which products that should be available in your Spotify store, this can be done by working with custom fields. If you do not have any custom fields set up, then you will only be able to select "Always Online".
You can create custom fields that can be checked on your products, which will allow you to only show products that are checked in that specific field.

This means that if you select one of your custom fields, then your store will only show the products that are connected with that specific field.
Custom Fields is a feature that is available to users with a premium Rackbeat agreement, you can read more about it here: Custom Fields in Rackbeat
How do I add and connect the custom field to Online availability?
To add a custom field for this, you have to go to your "Company Settings" and select the tab "Fields" in the menu at the top. Here you have to find "Item" and click "Create a new field".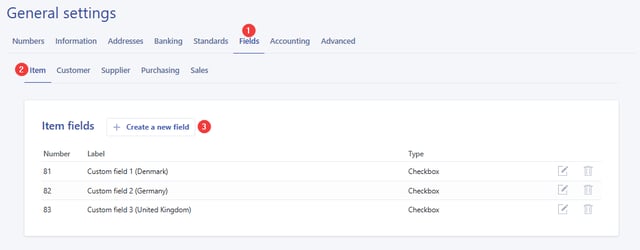
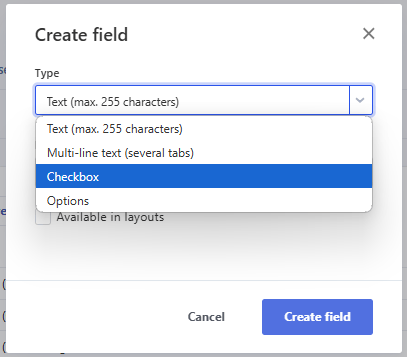
When you click to create a new field, a pop-up window will come up, here you have to select the "Type" and set it as "Checkbox".
Set the "Name" as you want it to be, in this example it will be called "Custom field 4 (Norway)".

Check the field "Available in Layouts" and click "Create field" to create the field.
To connect the field to a specific product, you then have to find the product in your product overview, click to edit it and check the field that you have created.
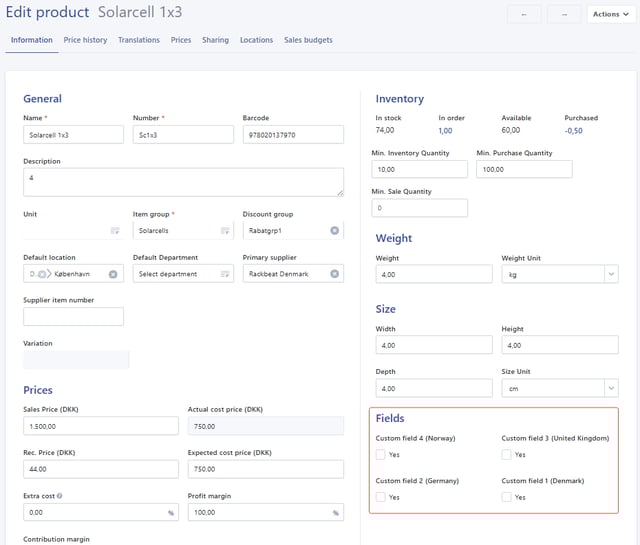
Remember to save your changes and now the product is a part of the custom field.
If you add the field after setting up the integration, simply go back into your integration settings, change this particular setting to the correct field and save your changes.
Sales prices in Rackbeat are excluded Vat

If you check this, we will add vat (based on the domestic vat for the product group) on your sales prices when data is sent to Shopify. This option is only used when Product Synchronization is set to Rackbeat.
Stock Synchronization
These settings determine how stock values are transferred to Shopify.
Synchronize inventory status from Rackbeat to Shopify
![]()
If you check this field the available quantity will be synced from Rackbeat to Shopify on every update Live sync.
Shopify primary warehouse

Here you have to select which location in Shopify that the stock should be synchronized to.
Stock type to synchronize

We recommend choosing 'Available' to avoid selling items that are currently in order.
Here you have to select what kind of stock type you want to send to Shopify:
- Available: Here you will only show the stock that is not reserved for productions or other orders.
- In stock: Here you will show the total stock regardless of reservations for productions or other orders.
Important: Rackbeat is always the master when pushing stock levels to Shopify.
Sync stock for all duplicate SKU's (up to a maximum of 250 products)
![]()
Enabling this option will update all duplicate SKU's in Shopify with the stock amount from their Rackbeat counterpart.
Order Settings
Order Synchronization
Select the status Shopify orders should have, before being synchronized to Rackbeat
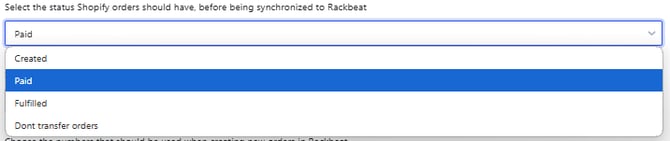
Here you have to select what status the orders from Shopify should have before they are sent to Rackbeat, you can select between the following options:
- Created
- Paid
- Fulfilled
- Don't transfer orders
Select the status for new orders created in Rackbeat
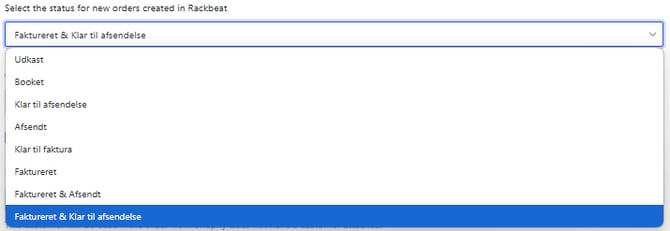
Here you have to select the status for how the order should be received in Rackbeat, you can select the following options:
-
Udkast – Draft
- The order will land in Rackbeat as a draft and will then have to be manually handled.
-
Booket – Booked
- The order will land in Rackbeat as a confirmed order, the shipment and invoice have to be manually handled.
-
Klar til afsendelse – Ready to ship
- The order will land in Rackbeat as a confirmed order with a draft shipment that needs to be booked, the shipment and invoice have to be manually handled.
-
Afsendt – Shipped
- The order will land in Rackbeat as a confirmed order, the shipment is shipped and the invoice have to be manually handled.
-
Klar til faktura – Ready for invoice
- The order will land in Rackbeat as a confirmed order, the invoice is created as a draft and no shipment is created.
-
Faktureret – Invoiced
- The order will land in Rackbeat as a confirmed order, the invoice is booked and only the shipment needs to be created.
-
Faktureret & Afsendt – Invoiced & Shipped
- The order will land in Rackbeat as a confirmed order, the shipment is shipped and the invoice is booked. Fully complete flow.
-
Faktureret & Klar til afsendelse – Invoiced & Ready to ship
- The order will land in Rackbeat as a confirmed order, a draft shipment and draft invoice have been created and only need to be booked.
Choose the numbers that should be used when creating new orders in Rackbeat

Here you have to select which number range should be used for the order when it is sent to Rackbeat. You can select to use the number range from either Shopify or Rackbeat.
Transfer Shopify refunds to Rackbeat as credit notes
![]()
Here you can decide whether or not you want the integration to create refunds from Shopify as a credit note in Rackbeat.
Default customer for Shopify Orders

Here you have to set the default customer that the integration will use if the order from Shopify is not attached to a specific customer.
This customer will be used if the order from Shopify does not have a customer attached.
NOTE: The Rackbeat customer must have email, and addresses.
Order Fulfillment
Rackbeat primary warehouse

Here you can set the primary warehouse where you want the integration to adjust the stock when an order comes from the webshop.
Shopify POS
Select status for new Shopify POS orders created in Rackbeat
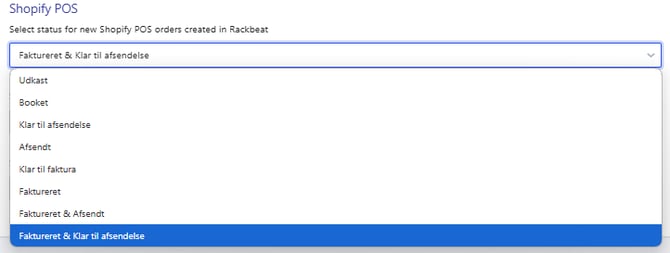
Here you have to set the status for new Shopify POS (Point of sale) orders that are created in Rackbeat, you can select the following options:
-
Udkast – Draft
- The order will land in Rackbeat as a draft and will then have to be manually handled.
-
Booket – Booked
- The order will land in Rackbeat as a confirmed order, the shipment and invoice have to be manually handled.
-
Klar til afsendelse – Ready to ship
- The order will land in Rackbeat as a confirmed order with a draft shipment that needs to be booked, the shipment and invoice have to be manually handled.
-
Afsendt – Shipped
- The order will land in Rackbeat as a confirmed order, the shipment is shipped and the invoice have to be manually handled.
-
Klar til faktura – Ready for invoice
- The order will land in Rackbeat as a confirmed order, the invoice is created as a draft and no shipment is created.
-
Faktureret – Invoiced
- The order will land in Rackbeat as a confirmed order, the invoice is booked and only the shipment needs to be created.
-
Faktureret & Afsendt – Invoiced & Shipped
- The order will land in Rackbeat as a confirmed order, the shipment is shipped and the invoice is booked. Fully complete flow.
-
Faktureret & Klar til afsendelse – Invoiced & Ready to ship
- The order will land in Rackbeat as a confirmed order, a draft shipment and draft invoice have been created and only need to be booked.
Select a fixed customer number for new Shopify POS orders

Here you have to set the default customer that the integration will use when an order from the POS system is sent to Rackbeat.
Select a fixed Rackbeat warehouse for new Shopify POS orders

Here you have to select the location that is used when an order from the POS system is sent to Rackbeat. This is the location where the stock is adjusted.
Advanced Settings
Advanced order options
Use customer product prices

Enabling this option will use any customer specific pricing on products coming from Shopify. Be aware that this might create orders in Rackbeat, that are not identical to the ones in Shopify.
Mapping of Delivery Country vs. Rackbeat Location

Enabling this option lets you define a Rackbeat location to use for fulfillment, when an order comes in from the selected country
Manually GET Shopify Order

Manually pull an order from Shopify using the order ID from Shopify (the number at the end of the Shopify URL). Only for troubleshooting purposes, use this at your own risk - may create duplicates)
Deleting the Integration
You can delete the integration at any time by:
-
Going to the Company Settings.
-
Clicking on Apps.
-
Finding the Shopify integration.
-
Clicking the trash icon next to the integration to delete it.
This action cannot be undone.